
A Step-by-Step Guide to Creating Melting Cartoon Characters
A Step-by-Step Guide to Creating Melting Cartoon Characters
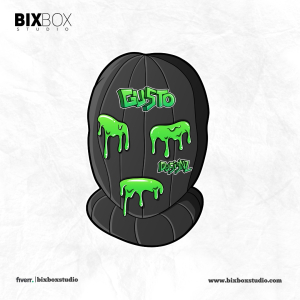
Creating melting cartoon characters can add a unique and eye-catching element to your illustrations. This creative technique involves giving the illusion that the characters are melting or dripping, resulting in a visually intriguing and surreal effect. In this step-by-step guide, we will explore the process of creating melting cartoon characters, providing you with the tools and techniques to bring this captivating style to life.
Step 1: Sketching the Character
Begin by sketching the cartoon character you want to depict. Start with a basic outline of the character’s shape and features. Keep in mind that melting characters will have exaggerated and distorted proportions, as if they are slowly losing their form. Play with different poses and expressions to capture the melting effect effectively.
Step 2: Creating the Melting Effect
To create the melting effect, imagine the character’s form gradually dripping or liquefying. Add wavy and drooping lines to the edges of the character’s body, emphasizing the areas that would be most affected by melting. These lines can be irregular and uneven, mimicking the organic and unpredictable nature of melting substances.
Step 3: Adding Texture
Texture plays a crucial role in conveying the melting effect. Add drips, drops, and irregular shapes along the melting lines to create the illusion of liquidity. These textures can vary in size and shape, resembling molten wax, melting ice cream, or any other melting substance you envision. Experiment with different textures to achieve the desired visual impact.
Step 4: Incorporating Colors and Shading
Choose colors that enhance the melting effect and add depth to the character. Darker shades can be applied to the areas where the character is melting, emphasizing the shadows and highlighting the contrast between solid and liquid forms. Consider using vibrant or contrasting colors to enhance the surreal and captivating nature of the melting cartoon character.
Step 5: Refining the Details
Refine the details of the character, paying attention to the melting lines, textures, and shading. Make sure the melting effect appears cohesive and intentional throughout the illustration. Add additional details, such as facial expressions or accessories, to enhance the character’s personality and story.
Step 6: Experimenting with Backgrounds and Compositions
Consider the overall composition and background elements that complement the melting cartoon character. Experiment with different backgrounds, such as abstract shapes, fluid patterns, or melting landscapes, to enhance the visual impact and create a cohesive visual narrative. Ensure that the background elements do not overpower the character but instead amplify the melting effect.
Step 7: Digital Enhancement (Optional)
If working digitally, you can enhance the melting effect by using digital tools and effects. Experiment with filters, blending modes, or liquify tools to further manipulate the character’s form and create a seamless melting illusion. Remember to maintain a balance between the digital enhancements and the hand-drawn elements to preserve the organic and artistic quality of the illustration.
Creating melting cartoon characters involves a combination of sketching, creating the melting effect, adding texture, applying colors and shading, refining the details, experimenting with backgrounds, and potentially enhancing the artwork digitally. This step-by-step guide provides you with the framework to explore this captivating style and unleash your creativity in producing surreal and visually engaging illustrations.
If you need an illustration of the melting cartoon character, you can contact bixboxstudio@gmail.com or contact directly https://bixboxstudio.com/contact/


Leave a Reply
Want to join the discussion?Feel free to contribute!